Monday, October 25, 2010

Me, StrongME, and Better'n PB Giveaway!

Hello readers! I have not abandoned you, but somehow I managed to go 5 whole days without blogging. It's not because I've been without fabulous recipes and nutrition info to share... I've just been so busy sharing  with some other fabulous people. Those people would be my 6th grade students at a local charter school in Memphis, TN!
Recently, I was given the opportunity to fill in as a nutrition counselor at a wonderful 12-week family weight management program based here in Memphis. I met with children and their families to go over their food logs and share some healthy cooking and baking techniques. I was also able to discuss and answer questions they had about how to plan healthy meals when you're on the go so often. This amazing program was started by Dr. Janice Pride-Boone, a fabulous Harvard trained pediatrician, who saw the need for an intervention program for childhood obesity... one that involved the whole family. She decided to do something about it and started StrongME! Please check out their website, especially if you're a local Memphian and know someone who could benefit from participating in such a program.

Parents & children participate in a group fitness class (such as Zumba) at the begining of each session - this photo is courtesy of StrongME!

 
 Nutrition discussion during a StrongME session -  this photo is courtesy of StrongME!
All that to say, after my one night "gig" as a nutrition counselor, I was offered the opportunity to help StrongME crossover into the school setting. Last week I began going to one of the Memphis middle schools to talk to the 6th graders about nutrition and healthy living. I'll be doing this about twice a week for the duration of the fall semester and spring semester as well. I couldn't be more thrilled! During the first week, I introduced the idea of nutrition and healthy living. Dr. Pride-Boone was also on hand to tell them about pediatric obesity and the consequences of it. What I found to be shocking was that she actually had a patient who ended up having their gallbladder removed due to complications with obesity! That's the type of surgery that obese adults are having!) 12% of adults that is, and after having a solid a 50 years WITH their gallbladder! If you're interested in reading more about obesity and gallbladder disease, check out this article over at Obesity Action Coalition.

Now you may think, "Woah! My kid doesn't even know what a gallbladder is! Heck, I don't even know what it does! Why on earth would it be necessary to talk to kids about this kind of thing." The honest answer in my opinion is this... ignorance is bliss. The very fact that we don't talk about the extreme and paniful consequences of such a disease is what leads us to think nothing of super sizing that #4 with extra cheese and bacon!!! In fact... my question is, why not talk to kids about this!?!? They're smart, and they should be more informed about the effects of their decisions, especially when it's related to their health and their body! The fact is, we don't give kids enough credit.
Most recent report of childhood obesity, "F as in Fat: How Obesity Threatens America's Future 2010."
This photo is courtesy of Trust for America's Health

If you know me, then you know that I have a passion for nutrition, especially in nutrition education for children. You would think that nutrition and health would be a mandatory class given the skyrocketing obesity rates that continue to grow at an alarming rate. Unfortunately, health and nutrition aren't on the report card that little Suzie takes home... therefore why would Suzie's teacher take time away from teaching science, math, social studies, etc to teach something that isn't covered on those very important tests which school's funding is based upon? I'm not blaming Suzie's teacher for this... but until legislation gets passed requiring a graded wellness course, that aspect of education gets set aside. If you agree with me... that health and nutrition education should be required, then make your voice heard in your state! Find out how over at the Health Education Advocate.

Ok! I'm off my nutrition education soapbox! I thought I'd share some of my favorite techniques for healthier cooking and baking. These are the exact same tips I shared with the parents at StrongME a few weeks ago!

'Cause I actually believe that you can have your cupcake and eat it too...
Just use applesauce instead of vegetable oil ;)
Enjoy and happy baking!

Healthier Cooking...
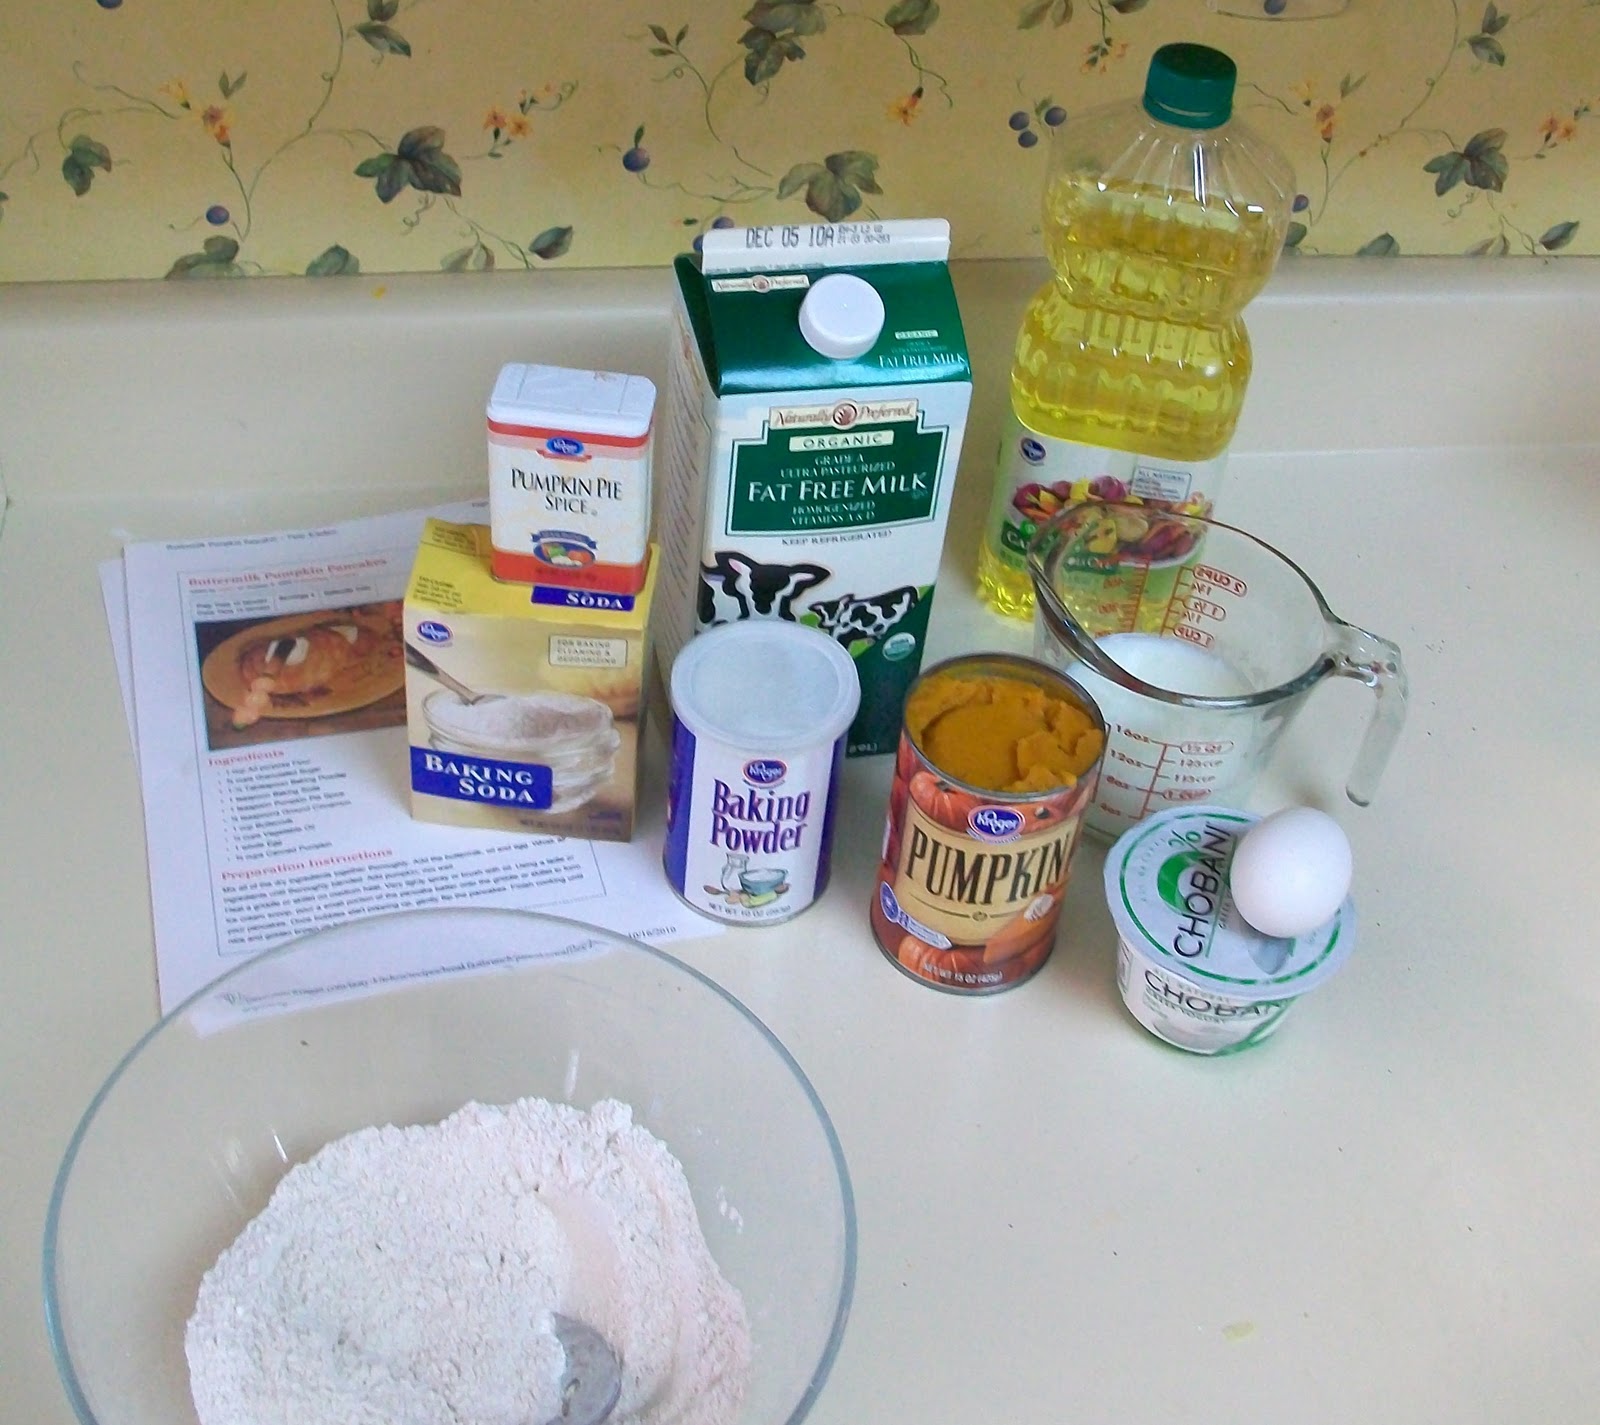
Make healthier mashed potatoes by adding Greek yogurt instead of fattening sour cream. You'll still get the creamy texture without all of the fat.                    
Holy Guacamole! Add ½ cup of plain 0% Greek yogurt for every whole mashed avocado that you use in your favorite guacamole recipe for some an added protein punch at your next fiesta.
*** Check out my Perfect Pumpkin Pancakes recipe made with Chobani 2% Plain Greek yogurt! ***
Slice sweet potatoes lengthwise into wedges, toss with cracked pepper and drizzle with olive oil. Bake at 450 degrees for 30 minutes (tossing occasionally) until tender and golden brown for a delicious side item of sweet potato "fries."
For the taste of fried foods without the calories, trying using Panko Japanese bread crumbs as a crispy, crunchy coating.
Healthier Baking...
Substitute unsweetened applesauce for oil in any baking recipe. This will dramatically cut the fat and calories, and will leave you with a moister brownie or cupcake than any amount of fat could try to accomplish.  
Don't feel that you should follow every recipe exactly! Feel free to decrease the amount of sugar in a recipe. Try substituting some of the amount with agave nectar, which is much lower on the glycemic index and twice as sweet as sugar… which means you can use less!
Bake without breaking… an egg! Use liquid egg whites (available in small cartons in the egg section at the grocery store) in place of whole eggs for zero fat and zero cholesterol. Added bonus… no worrying about egg shells getting in the batter!
***Check out my AWESOME recipe for Pumpkin & Dark Chocolate Chunk Cookies where I used the above three healthy baking techniques!***
By toasting nuts, you can bring out a stronger flavor…  therefore you only have to use half the amount and still get the nutty flavor that you desire.
Give it away, give it away, give it away, give it away now!
That Red Hot Chili Peppers song just popped in my head. Not sure why. ACTUALLY... it could be because I'm hosting my first blog giveaway! Wanna know what it is? Well, you know that peanut butter that I'm OBSESSED with? Ya know, the one I wrote about here and here... The kind folks over at Better'n Peanut Butter were so happy that I had been spreading the peanut butter (no pun intended) love around, that they wanted me to able to share it with my fabulous readers!
So when this box arrived the other day, I was so excited to see what was inside...
They put PB on a diet... and it's oh-so-good! 
There was 1 jar of Original Better'n Peanut Butter AND 1 jar of Chocolate Better'n Peanut Butter! Now I haven't been able to find the chocolate variety in my home town, so I was so tempted to keep this one for myself. But I love my readers too much :) So... the winner of this giveaway will receive BOTH jars of Better'n Peanut Butter!

This giveaway is Vegan and Anti-Gluten friendly... both products are dairy free and gluten free! Cheers!
To enter just leave a comment on this post and tell me... what is your favorite way to enjoy peanut butter? If you win, you'll be able to REALLY enjoy it, because Better'n Peanut Butter contains 85% LESS fat and almost HALF the calories of your normal jar of PB! Hello... I'm hungry. I'll pick a winner using a random number generator on Wednesday. Last chance to enter will be Wednesday, October 27th at 6pm (central time.) Good luck!


Also - since I don't leave you with an actual recipe today... I will leave you with this photo of Mr. Teddy:
1 Pug + 1 Hot Dog Halloween Costume = Recipe for Cuteness

Wednesday, October 20, 2010

Wordless Wednesday

I scream, you scream, we all scream for ice cream frozen yogurt!

Fall is my favorite season, and that means a few of my favorite things... 
sweater season
crunchy leaves outside
cooler temps...
which means Mr. Teddy gets longer walks, pugs don't fare well in the heat,
and finally, pumpkin flavored goodness!

...which leads me to this fall indulgence year after year
TCBY pumpkin yogurt + whipped cream + cinnamon = HEAVEN!
Portion Distortion People!
This is a kid's size cup and it was PLENTY of froyo to hit the spot. 
Remember, kid's sizes aren't just for kids ;) 

I realize this isn't exactly a wordless Wednesday post, but it's a minimal words Wednesday... for me at least!
HAPPY WEDNESDAY!


Tuesday, October 19, 2010

Bananarama! Muffins and MORE!

My favorite thing ever... the Kroger Bag o' Bananas!
**Photo Disclaimer: I seem to have misplaced my camera... so these cell phone pics will have to do**

The recent trend on my kitchen counter is the overflowing amount of bananas that I seem to be accumulating. I'm sorry, but I just can't resist Kroger's cute little "Ready for Baking" discounted bag o' bananas, ya know... the ones that have lost all traces of green and perhaps are a bit brown in areas. I'm just saying... I like a nice mashed banana stirred into my morning bowl of oatmeal (topped with a blob of Better'n PB of course) or tossed into a blender for a tasty smoothie on a ridiculously hot Memphis afternoon.

My Top 5 Uses for a "Ready for Baking" Bag O' Bananas:
1. Place in ziploc bag for 24 hours, throw it in your freezer. Then... toss them in a food processor. Pulse, scrape down the sides, pulse some more, scrape down the sides again... keep doing this until your frozen bananas look like frozen yogurt, or faux-gurt... I'm so clever. :) Delicious. Easy. Healthy. Give it a try.

2. Add a mashed banana to my stovetop oats. Check out my post with my go-to recipe for "Banana Oats." Topped with my fave Better'n PB... this is probably my favorite breakfast of all times.

3. Muffins! Banana muffins! Add dark chocolate chips, coconut, pecans, walnuts, dried fruit, chopped strawberries, or whateva other add ins that float your banana boat.

4. Be a smoothie king (or queen!) My personal fave is a "Green Monster Smoothie." Give that recipe a try and I promise you'll be hooked on these FABULOUSLY delicious and green monsterrific smoothies... and you'll never taste the hefty dose of iron and calcium that you'll be getting from the spinach! Oh and double that dose of calcium with the milk... sianara feeble bones!

5. Finally... training treats for Mr. Teddy! His intake of "people food" is very limited. I've gotta watch that puggy waistline! He is allowed to eat fresh fruits and veggies, with the exception of grapes or onions - they're poison for dogs y'all!
That's a slice of banana on the floor... Mr. Teddy doesn't even look at me as he sits patiently while I instruct him, "Wait... wait... wait... Ok!" As soon as I say "Ok" that pug moves faster than you would believe!

All that to say, banana muffins have been popping out of my oven faster than you can say Curious George.  However, this girl can only eat so many banana muffins myself before I have to start worrying about the formation of my own "muffin top" above my jeans. Not cute.

Luckily I have a fabulous roommate, who also has a love of cooking, baking, nutrition, and food in general, like moi! Side note - we met in our Principles of Food Preparation class at U of M. However... she is lactose intolerant. Which means if I wanna whip up a batch of cupcakes on whim, I have to be a bit more creative if I don't wanna wind up being the only one eligible to consume those little baked treats. In addition, I get to sample her old standby dairy-free recipes. Pretty sweet deal, right? Here's a recipe that I whipped up earlier this evening to make use of some of those bananas on my counter.


Gabby-Friendly Banana Muffins 
1/4 C liquid egg whites (or 2 whole eggs)
1/3 cup *buttermilk (I used the "mock" buttermilk technique that I first wrote about in my pumpkin pancake recipe, I also used you light vanilla soy milk so that Gabby could enjoy the muffins as well)
1/2 cup unsweetened applesauce
4 ripe bananas, mashed
1/2 cup agave nectar 
3/4 cups all-purpose flour
1 cup whole wheat flour
1 teaspoon baking soda
1/2 teaspoon salt
1 Tb vanilla extract
2 Tb. chia seeds
2 tsp cinnamon
1 tsp nutmeg
1/4 cup walnut pieces

- Preheat oven to 325 degrees F (165 degrees C). Line your muffin tin with some cute paper liners.
- Blend together the eggs, milk, applesauce and bananas.
- Sift together the sugar, flour, baking soda, vanilla, cinnamon, and salt. Add to banana mixture and stir in pecans. Mix well.
- Fill each liner about 2/3 full, place about four small pieces of walnuts on top of each unbaked muffin. 
- Bake for 18 - 22 minutes, or until a cake tester inserted in the center comes out clean.
Yields:18 muffins*"Mock buttermilk" Take your liquid measuring cup and pour in 1 tsp lemon juice or white vinegar. Then add enough milk to fill to the 1/3 C. line (essentially you'll be using just under 1/3 C. of milk.) Let stand for 5 minutes... use as recipe directs.
 

Into the oven they go..

... and out of the oven they come!


Gabby was working late so I left her this note letting her know they were "Gabby-friendly" ;)
I'm currently partaking in my fave Tuesday night tradition, Biggest Loser and painting my nails.  This is how Mr. Teddy usually "places" himself on my lap. Thought yall might get a kick out of this. Apparently, just because you weight nearly 30 pounds doesn't mean you can't be a lap dog.

Sunday, October 17, 2010

Perfect Pumpkin Pancakes

Pumpkin Pancakes... I. Love. You. Look at the beautiful orange color!
I'm gonna keep this post short and sweet... like the delicious stack of pumpkin pancakes that I had for breakfast yesterday... recipe to follow ;) I know, yet another pumpkin recipe, and I'll make no apologies. Autumn does this to me, and honestly, doesn't everything taste so much better with a little pumpkin spice.

This weekend... my oldest brother, his sweet wife, and my absolutely adorable nine month old niece came to visit all the way from Birmingham, AL. My mom decided to whip up a special Saturday morning breakfast... pumpkin pancakes, oh my! I thought this might be the perfect opportunity to test out some of the Greek yogurt that Chobani sent me. I had seen pancake recipes before using yogurt... so why not pumpkin pancakes? And why not Greek yogurt? If you wanna know why I've gone Cho-razy over Chobani, then check out my previous post, Ode to a Grecian Yogurt.

I chose the 2% Plain Chobani Greek yogurt for this recipe
 The result? Awesome-town USA! These pancakes were so moist, fluffy, delightful... and perfectly pumpkin! I highly recommend! I'll definitely add yogurt to pancake mix from now on!


Perfect Pumpkin Pancakes
1 C. All-purpose flour
1/4 C. white sugar
1 1/4 tsp baking powder
1 tsp. baking soda
1 tsp. pumpkin pie spice
1/2 tsp cinnamon
1 C. buttermilk**
1/4 C vegetable oil
1 whole egg
3/4 C. canned pumpkin puree
1 (6 oz.) contain of Chobani 2% Plain Greek Yogurt

- Mix all dry ingredients together thoroughly.
- Add the buttermilk, oil, and egg. Whisk all ingredients until thoroughly blended,
- In a separate bowl, add the yogurt to the pumpkin puree. Stir until blended.
- Add the pumpkin and yogurt mixture to the pancake batter and mix well.

Pumpkin mixed with yogurt...
Finished pumpkin pancake batter, ready for the griddle!
- Head griddle or skillet on medium heat. Spray lightly with nonstick cooking spray.
- Using a laddle or small measuring cup, pour a small portion of batter on the griddle/skillet to form your pancakes.
- Once bubbles begin to appear, gently flip the pancaked. Finish cooking until nice and golden brown on both sides.
- Enjoy with a drizzle of REAL maple syrup or some agave nectar (sorry, but the Aunt Jemima and Eggo brand contains HFC... high fructose corn syrup, which is not cool!) Mmm! ENJOY!

My mom was the short order cook for the day, so I took the time to relax and hang out with the fam...
Jordan (my lovely sister-in-law) and Alex (my brother) enjoyed the pancakes... with a side of fresh fruit.

My preggers sister was a fan of the pancakes, and apparently the coffee creamer.
**Did you know that you don't need to run out for buttermilk when a recipe calls for it? I have a solution that will save you the extra trip to the grocery store... and unnecessary calories and fat. You ready for this? MAKE IT YOURSELF! Yea, seriously... all you need is whatever milk you have on hand and some lemon juice or white distilled vinegar. Essentially buttermilk is just fermented milk caused by the presence of acid... which gives buttermilk the tart flavor. Here's a simple way to make your own... this is what we did for the pancakes we made yesterday.

Take your 1 C. liquid measuring cup and pour in 1 Tb. of lemon juice or white vinegar. Then add enough milk to fill to the 1 C. line (essentially you'll be using just under 1 C. of milk.) Let stand for 5 minutes... use as recipe directs. 

I thought my little niece, Ruthie, might want to try the leftover remnants of yogurt inside the container...

I think she was more impressed with the fun container...

Doesn't this look like an ad?
 

Well, that's all for now friends! Hope yall had a wonderful weekend! I know I did! :)

Yogurt on FoodistaYogurt

Friday, October 15, 2010

Not Your Grandmother's Lasagna...


So recently, I was staring at the huge basil TREE plant in my front yard and realized I needed to make something Italiano! So.... lasagna??!?!! Why not? I had never made it before, and I know, I'm half Italian, please forgive me Mimi. :) My sweet grandmother (Mimi) is the reason I put fresh basil in and on everything. Check out my recipe for homemade pizza and pizza crust... topped with lots of fresh basil! Mimi has shared plenty of her recipes with me over the years, like her famous meatballs, marinara sauce from scratch, etc etc etc... which is never complete without a glass of red wine. I love her, she's fabulous. And she's always my #1 fan in everything... so here's a little shout out to her!

My adorable Italian grandmother, Mimi, and I last summer in NJ.

      
I looked up a good recipe on the always trusty allrecipes.com (the google of recipe search engines.) I found THIS one, World's Best Lasagna. Ok, how can you argue with nearly 4,500 reviews? No literally, that's not an exaggeration... 4,484 as of today.

Of course, I never leave a recipe as is... I always find something to change/alter/substitute, and what have you. This time... the victim ingredient was the meat sauce, which called for lean ground beef (Laura's ground beef pictured below is my preferred choice) and Italian sausage. I decided to use ground bison instead of the sausage. "Bison?!?!" you say... yes, bison. I was first introduced to bison about a year ago. It's a little more expensive than ground beef... but if you're purchasing lean ground beef anyways, there's not too much of a cost difference.

Check out the nutrition info about bison over on the USDA's website.... there's a reason that bison was the main source of EVERYTHING for the Native Americans back in the day. Here's why I was so impressed with bison vs. beef:
1. Antibiotics and growth hormones are NOT given to bison... across the board. Wish we could say the same for cows.
2. Because bison are much leaner, you won't find that white marbling that is very evident in beef.
3. Bison roam freely, and are grass-fed for most of their lives. They are only fed grain during the last 3 - 4 months of their life. Here's why... the fat of grass-fed animals is yellow due to the high content of beta carotene. That's good though! Beta carotene is the nutrient that makes carrots and sweet potatoes orange. Consumers tend to prefer the fat to be white, which is why they get the grain at the end. I guess people don't understand that the yellow fat is a good thing.
4. I personally prefer the taste of bison to beef, it's more tender and some say it tastes slightly sweeter... you be the judge. Throw some bison burgers on the grill next time you fire it up... awesome! Oh! And the picture of the crock pot just got me thinking that I may give bison chili a try soon! I love making a big ol' pot of chili in the fall! Mmmm...


Refer to the USDA link I provided to learn more about prep and storage of bison.


Bison Lasagna (my modifications are in purple)
1 pound sweet Italian sausage (1 Ground Bison)
3/4 pound lean ground beef (1 lb. Laura's Lean Ground Beef)
1/2 cup minced onion
2 cloves garlic, crushed
1 (28 ounce) can crushed tomatoes
2 (6 ounce) cans tomato paste
2 (6.5 ounce) cans canned tomato sauce
1/2 cup water
2 tablespoons white sugar (Didn't add sugar, didn't need it.)
1 1/2 teaspoons dried basil leaves (I used LOTS of fresh chopped basil!)
1/2 teaspoon fennel seeds
1 teaspoon Italian seasoning
1 tablespoon salt
1/4 teaspoon ground black pepper
4 tablespoons chopped fresh parsley
12 lasagna noodles
16 ounces ricotta cheese (I used part-skim, low fat)
1 egg
1/2 teaspoon salt
3/4 pound mozzarella cheese, sliced (I started with a black of mozzarella cheese, then ran out before I got to the top, so I went and I also used a package of sliced mozzarella just for the topping)
3/4 cup grated Parmesan cheese
Stroke of GENIUS! Let the sauce simmer in a crock pot!
  1. In a Dutch oven, cook sausage bison, ground beef, onion, and garlic over medium heat until well browned. Stir in crushed tomatoes, tomato paste, tomato sauce, and water. Season with sugar, basil, fennel seeds, Italian seasoning, 1 tablespoon salt, pepper, and 2 tablespoons parsley. Simmer, covered, for about 1 1/2 hours, stirring occasionally. (I didn't read the recipe through and didn't realize that I had to let simmer for almost 2 hours... cause I had to be somewhere the afternoon I made it. Then I had stroke of GENIUS! I threw it in a crock pot on low and let it cook while I was gone! Brilliant!)
  2. Bring a large pot of lightly salted water to a boil. Cook lasagna noodles in boiling water for 8 to 10 minutes. Drain noodles, and rinse with cold water. (The Bariella lasagna noodles I bought are AWESOME! No need to boil... the directions say to let them set in a dish of hot water for a minute or so before layering! These are a life saver!) In a mixing bowl, combine ricotta cheese with egg, remaining parsley, and 1/2 teaspoon salt.
  3. Preheat oven to 375 degrees F (190 degrees C).
  4. To assemble, spread 1 1/2 cups of meat sauce in the bottom of a 9x13 inch baking dish. Arrange 6 noodles lengthwise over meat sauce. Spread with one half of the ricotta cheese mixture. Top with a third of mozzarella cheese slices. Spoon 1 1/2 cups meat sauce over mozzarella, and sprinkle with 1/4 cup Parmesan cheese. Repeat layers, and top with remaining mozzarella and Parmesan cheese. Cover with foil: to prevent sticking, either spray foil with cooking spray, or make sure the foil does not touch the cheese.
  5. Bake in preheated oven for 25 minutes. Remove foil, and bake an additional 25 minutes. Cool for 15 minutes before serving.
Ricotta cheese and herbs mixture

Here's my assembly line...
notice the lasagna noodles soaking in the square dish > boiling noodles.

Then the ricotta...
... then some sliced mozzarella

... a few more layers and then into the oven! Pretty!
Success! Mama Mia! Papa Pia!
And it was oh-so-freaking-good!

Tuesday, October 12, 2010

Ode to a Grecian Yogurt

A few weeks ago, I was contacted by a representative at Chobani (one of the "big guys" in the Greek yogurt biz) to see if I would be interested in receiving some of their products to sample and use in some of my recipes here on my blog.

My thought process was as follows:
1. Um… yes please! Who doesn't love freebies!?!?
2. Greek Yogurt? Heck yes I will! I'll take that double of dose of protein! As a girl who considers herself "vegetarian-ish," I can always use the extra protein.  And by "vegetarian-ish" I mean that I usually consume chicken or fish probably for no more than 2 meals a week. I rarely eat red meat… but it does happen ever so often.
3. Greek yogurt? In recipes… well color me curious! I've used plain Greek yogurt in mashed potatoes before (in lieu of sour cream) but I had never really thought about BAKING with yogurt. The wheels started turning...

So about a week ago, I came home on my lunch break to find this beast in my kitchen…

Mr. Teddy was just as curious...
My sweet roomie was kind enough to open it up and place the yogurt in the fridge. Thanks Gabs! :)  
I could see the brightly colored label peering out between the opening of the box. When I opened it up! Holy Flaxseed! It was like Christmas! I was greeted with a surplus of Greek goodness... every flavor they offer!


I was stoked, and I didn't waste any time for ripping off the lid of the peach yogurt, I threw on some chia seeds, a handful of Quaker Oatmeal Brown Sugar Squares (one of my fave cereals,) and go to "work" testing out this lovely, creamy, delicious yogurt!

First up... Peach! DELISH!
So what is the hype with this Greek yogurt that you're starting to see more often? Well first of all, you should know that it's called "Greek" yogurt because of the method used when making it. It's a straining technique that takes out all the excess liquid. This leave you with nothing but rich, thick, creamy, yogurt-y goodness! And without that texture that you get with those other yogurts. I know there's some anti-yogurt people out there, I've met them (and I may or may not have been one up until about 3 years ago,) if it's a texture thing that bothers you... give this variety a whirl! You won't be disappointed.

Let's talk about protein...hello PROTEIN! I'm a big advocate of trying to incorporate some carbs, a protein, and health fat into every meal and snack. You body uses each at different rates, so it will leave you feeling satisfied longer, and keep you going longer. Don't we all need a little energy around 2pm? Thought so. In fact... if you add a sliced banana and sliced almonds on top of the vanilla Chobani yogurt (my favorite flavor) and you'll have the perfect snack: 
Protein: Greek yogurt
Carb: Banana
Healthy Fat: Almonds

Chobani Greek yogurts contain 13g - 18g of protein, depending on the variety you choose. To put things in perspective of the protein power that this product has lets see how some other protein-rich foods measure up:
2 Tb. Peanut Butter = 8g protein 
1 C. Milk = 8g protein
1 large egg = 6g protein (3 eggs would equal the protein in a single cup of Chobani's 0% Plain Greek yogurt) 
3.5 oz. of boneless, skinless chicken breast = 30g protein
4 oz. hamburger steak = 28g protein

Oh, and don't forget about the bacteria, but not the gross kind! Chobani yogurt contains probiotics (aka the good guys of the bacterial world…) which help to make thousands of good bacteria living inside your body even stronger! Well what does that mean for you... a more efficient digestive system and stronger immune system.

Can you guess which is the probiotic? Hey, I spent 2 years teaching nutrition to children, I believe in visuals! Ok? ;)
Now before you start giving me the whole, "Hey Laurie – remember that time you said buy organic dairy products… what's up with the contradiction? This stuff ain't organic!" First of all… I choose to buy organic milk, and I'm not forcing you to do so… however the benefits of going organic in some areas totally outweigh the extra cost in my book. So that's my recommendation. Anyhow... Chobani isn't certified organic, true, but they follow as many organic guidelines as possible. You could say that they're pretty organic-ish ;) Their product doesn't contain any antibiotics or hormones (which is a main concern in non-organic dairy products) and BONUS… they work with a dairy farm that is only 15 miles away from their plant. Localvores unite!

So what sets Chobani apart from the other Greek yogurt brands? Flavors, flavors, flavors… and I don't mean "flavors," as in that artificial stuff! I'm talking about real pieces of fruit in that magical little round cup of goodness. Which sure… anyone can through in some fresh fruit in yogurt, right? I was even more impressed by the fact that this yogurt is all natural… no preservatives, no HFCS (high fructose corn syrup,) no artificial coloring. In fact, when glancing at the ingredient list you know what I saw listed?!? Tumeric (a spice) for color, and also fruit and vegetable juice! That's right real fruit & vegetable juice for color (had to say it twice because I was THAT impressed…) which is a heck of lot better for you than Red #40. Back to the flavor... besides the classics (strawberry, blueberry, peach,) Chobani features flavors that are pretty hard to come by in other Greek yogurts. Look for pineapple, POMEGRANTE (I'm a sucker for pomegranate,) raspberry, and strawberry banana! Yummers!

 
How do I eat my yogurt you ask? I like to spice mine up a bit with a few extras, usually ½ Tb of chia seeds and some sort of "crunchy." Recently I've been adding about 7 or 8 of Annie's Organic Bunny Graham Friends. I added those little guys to my cup of Chobani pineapple Greek yogurt today - which by the way, is out of this world! After I stirred in the bunnies, they softened up a bit and I SWEAR… it tasted kind of like cheesecake in a cup! However, this yogurt is perfectly delicious on its own.  


Don't take my word for it! Try it yourself! No seriously… head over to the Chobani website and print out a coupon! Just scroll down to the bottom of the About Us page.

What else can you do with this crazy Greek yogurt? Well… the possibilities are endless!
 - Use a substitute for sour cream in mashed potatoes! You'll still get that creamy, smooth texture you're going for and Greek yogurt is the perfect, healthier alternative. Remember how Thanksgiving is just around the corner? Well offer to bring the potatoes… you know they'll be healthier and no one will know the difference!
- Taco Tuesday coming up in your house? Well kick your guacamole up a notch (gotta love those healthy monounsaturated fats in avocados!) For every whole avocado you use, add ½ cup 0% Greek yogurt. Hello punch o' protein!
- A sweet little Italian lady that I work with (who reminds me of my Mimi up in NJ) suggested trying to substitute for ricotta! Her favorite and very simple pasta dish… make your pasta, top with the meat sauce, put ricotta (or Greek yogurt) and fresh mozzarella on top. Toss into the cheese gets all melty and delish. Now that just sounds like… yum!
- Hot dip! Spinach dip that is! Currently there's a recipes that looks AWESOME over on Chobani's website. Who doesn't love a good spinach dip... it usually makes the party, right?  One of my favorite party dip recipes from my mom's collection (hot artichoke dip - which I probably haven't eaten in at least 5 years) literally consists of nothing but artichokes, mayonnaise, parmasean cheese, and mozzeralla cheese. Sounds healthy, right? Ha! Well I think this yogurt could totally be substituted for the mayonnaise and you could get a similar result. I'm definitely gonna try that spinach artichoke recipe that's on their website. 

Those are just some savory uses for Greek yogurt. Stay tuned to read about some of my future experiments with this fabulous yogurt. I think I might be in the mood for some brownies….

Yogurt on FoodistaYogurt